

Mic Placement for Audiobooks: Crisp Sound Secrets
In the thriving audiobook industry of 2026, where global sales continue to surge amid advancements in AI narration and home production tools, mastering mic placement for narration is key to achieving crisp, professional sound without a fancy studio. Proper mic placement in audiobook recording isn't just technical—it's the foundation for capturing clear, engaging vocals that meet platforms like Audible's strict standards and keep listeners immersed. Whether you're seeking the best mic placement for audiobook recording, exploring narration mic setup tips, or fine-tuning audiobook microphone positioning, these secrets will help indie authors, narrators, and producers elevate their home setups. With the market emphasizing high-fidelity audio to compete with AI-generated content, getting this right can mean the difference between a rejected submission and a bestseller. Let's dive into proven strategies, backed by expert advice, to unlock that polished, studio-quality sound at home.
Why Mic Placement Matters in Audiobook Narration
Mic placement in audiobook narration directly impacts audio quality, influencing clarity, tone, and noise levels that can make or break listener engagement. In 2026, with home recording setups more common than ever, poor positioning leads to issues like plosives (those pesky "p" pops), sibilance (harsh "s" sounds), or muffled vocals, often resulting in ACX rejections or negative reviews. Proper setup captures the natural warmth of your voice while minimizing room noise, ensuring compliance with standards like a -60 dB noise floor.
The science is simple: Microphones have pickup patterns—cardioid mics, popular for narration, reject off-axis sound but require precise aiming to avoid proximity effect (boomy lows when too close) or distance falloff (thin sound when too far). For audiobook-specific needs, like long sessions without fatigue, placement affects breath capture and consistency. Experts emphasize that even budget mics shine with good positioning, reducing post-production edits and saving time. Ultimately, nailing this elevates your narration from amateur to pro, gripping listeners with crisp, immersive sound that rivals studio productions.
Best Mic Placement for Audiobook Recording: Core Principles
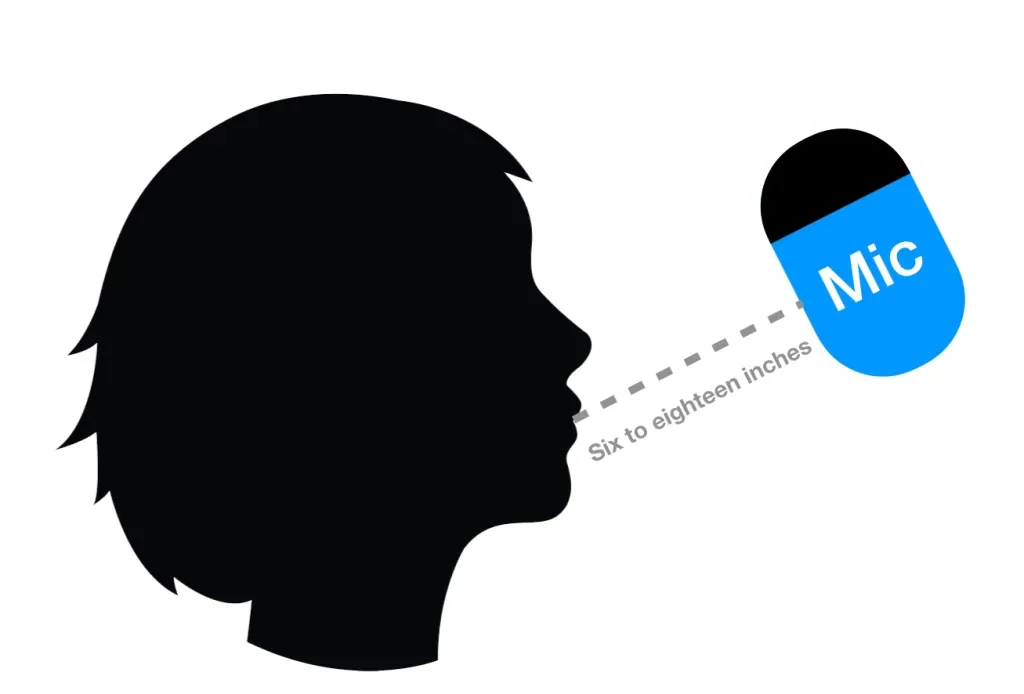
The best mic placement for audiobook recording follows core principles: distance, angle, and height, tailored to your voice and space. Start with distance—6 to 8 inches (15-20 cm) from your mouth is the sweet spot for most condenser mics, balancing warmth and clarity while reducing pops. Too close (under 4 inches), and you'll amplify breaths and mouth noise; too far (over 12 inches), and the sound thins, picking up more room reverb.
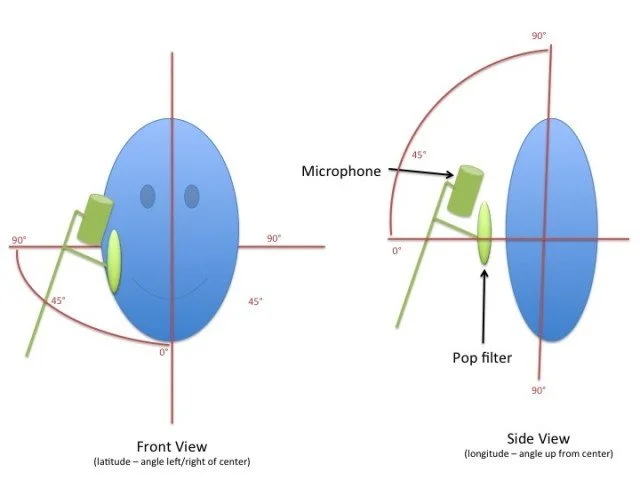
Angle is crucial: Position the mic slightly off-axis—about 45 degrees to the side or above—to minimize plosives and sibilance without losing presence. Point it downward toward your mouth from above nose level, encouraging a slight head tilt that opens the throat for better projection. This setup, often called the "above and angled" method, reduces direct air blasts while capturing natural tone.
Height-wise, align the mic capsule with your mouth or slightly above, using an adjustable boom arm for flexibility. Test by recording a sample script, listening for even volume and minimal artifacts. Adjust based on your voice type—deeper voices may need more distance to avoid boominess. These principles form the backbone of crisp sound, adaptable to any home environment.
Narration Mic Setup Tips: Optimizing Your Home Space
Narration mic setup tips begin with your environment—treat your space to complement placement. Use a cardioid or shotgun mic for focused pickup, mounted on a shock mount to isolate vibrations. Add a pop filter 2-3 inches from the mic to diffuse plosives, positioned so it doesn't obstruct your view of the script.
In your home booth, hang blankets or use acoustic panels behind and around the mic to absorb reflections—aim for a dead sound without echo. Sit or stand comfortably, maintaining consistent distance—use a marked floor spot or chair lock to avoid drifting. For multi-character narration, slight head turns can vary sound naturally without repositioning.
Monitor with headphones to catch issues real-time, adjusting gain so peaks hit -6 dB without clipping. In 2026, apps like Focusrite Control offer remote tweaks for USB interfaces, fine-tuning on the fly. These tips optimize your setup, ensuring crisp captures that require minimal post-editing.
Microphone Position for Voice Recording
Audiobook Microphone Positioning: Common Mistakes to Avoid
Audiobook microphone positioning pitfalls can sabotage even great narration—avoid them for crisp results. Mistake 1: Too close to the mouth, causing proximity effect and pops—stick to 6-8 inches. Mistake 2: On-axis aiming, amplifying sibilance—angle off 45 degrees.
Mistake 3: Ignoring height—too low picks up chest rumble; position at mouth level or above. Mistake 4: Inconsistent distance during sessions—use a fixed setup to maintain tone. Mistake 5: Neglecting room treatment—untreated spaces add reverb; add absorption for dryness.
Test setups with claps or test phrases to spot echoes or imbalances. Avoiding these ensures your positioning yields professional, crisp sound every time.
Advanced Hacks for Crisp Sound in Different Scenarios
For advanced narration mic setup tips, adapt to scenarios. In noisy homes, use isolation shields ($30-50) to block reflections and ambient sound, focusing the mic on your voice. For dynamic mics like the Shure SM7B, closer placement (4-6 inches) works due to lower sensitivity. Condensers like the Neumann TLM 103 prefer 8-10 inches for airiness.
In multi-mic setups for full-cast, position each 45 degrees off-axis to reduce bleed. Use EQ in post to fine-tune—cut below 100Hz for rumble if placement amplifies lows. In 2026, AI apps like Descript analyze placement via test recordings, suggesting adjustments. These hacks refine your technique for crisp, scenario-specific sound.
Tools and Gear to Enhance Mic Placement
Essential gear includes boom arms ($20-50) for flexible positioning and shock mounts ($15-30) to isolate vibrations. Pop filters are must-haves, with dual-layer models best for plosive control. For monitoring, closed-back headphones ensure you hear placement effects real-time. Apps like Mic Test Pro visualize patterns, aiding optimal setup.
Conclusion: Master Mic Placement for Audiobook Excellence
Unlocking crisp sound secrets through strategic mic placement for audiobooks transforms home narration into pro-level audio. By following the best mic placement for audiobook recording, applying narration mic setup tips, and refining audiobook microphone positioning, you'll capture vocals that captivate. In 2026's competitive market, these hacks ensure clarity and presence. Experiment in your next session—what adjustment will you try?
If mic placement is muddling your audiobook sound, Sounds and Such offers expert setup services, including narration mic tips and positioning optimizations for crisp home recordings—contact us today to secret your way to audio excellence!